


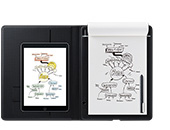


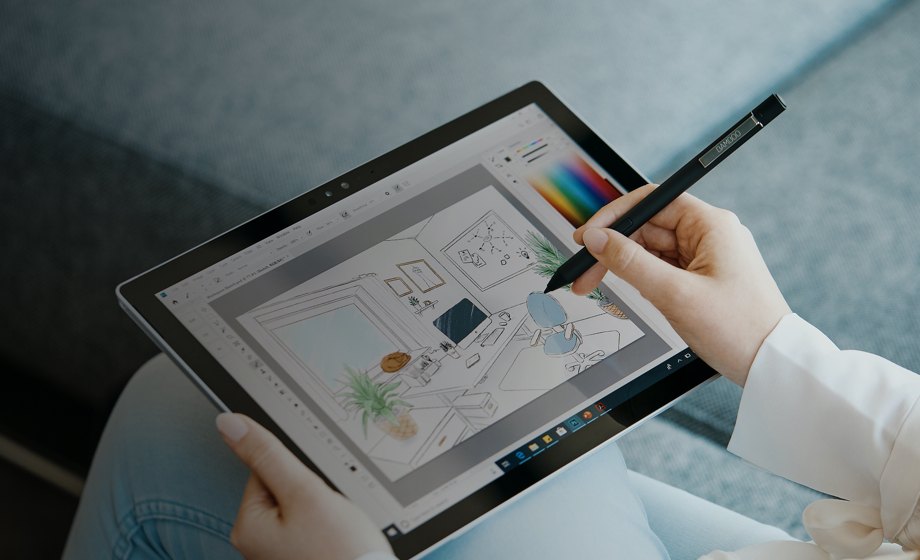
Pen tablets
Sketch, draw and edit images with a responsive pad, a precise pen and see your creations appear on screen.


Hello Wacom family! Perhaps you have heard already of the two point perspective? 2 point perspective drawing and how to create it is what we're talking about today.
In this picture, you see a cube. As shown, we are looking at it from above and to the right. The edges which are normally hidden from view are also shown here for complete understanding of the 2-point perspective.
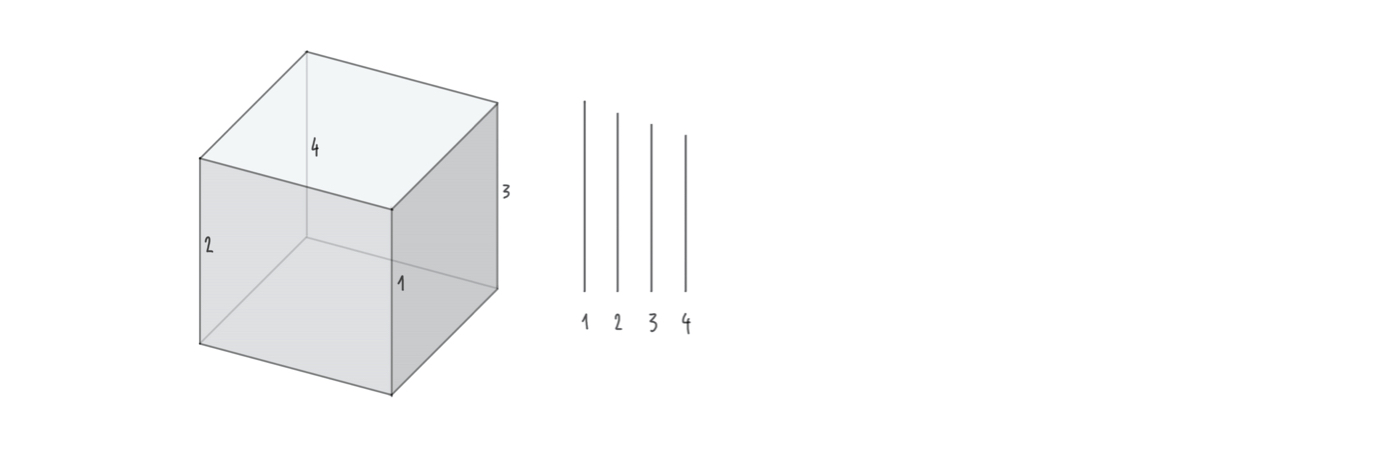
It is common knowledge that all the edges of a cube have the same length. However, objects become optically smaller the farther they get from the eye. In 2-point perspective drawing that means we have to give the vertical edges different lengths when we draw them. The edge furthest away must be the shortest.
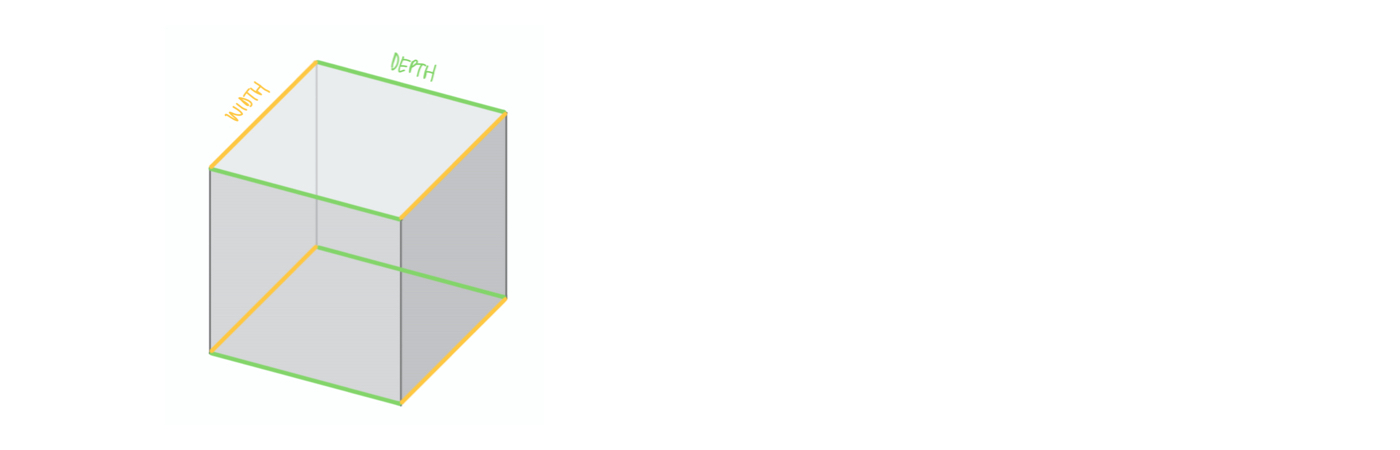
In the cube pictured here, the yellow and green sides - the depth and the width - are parallel. Not convinced? If you’re not sure, check it with a fixed square. It actually looks a little bit like the distances of the green lines get bigger to the left, and the distances of the yellow lines get bigger to the right. This is merely an optical illusion inherent in two point perspective. Our eye is used to distant objects becoming smaller. And that’s reason enough to make changes in our drawing.
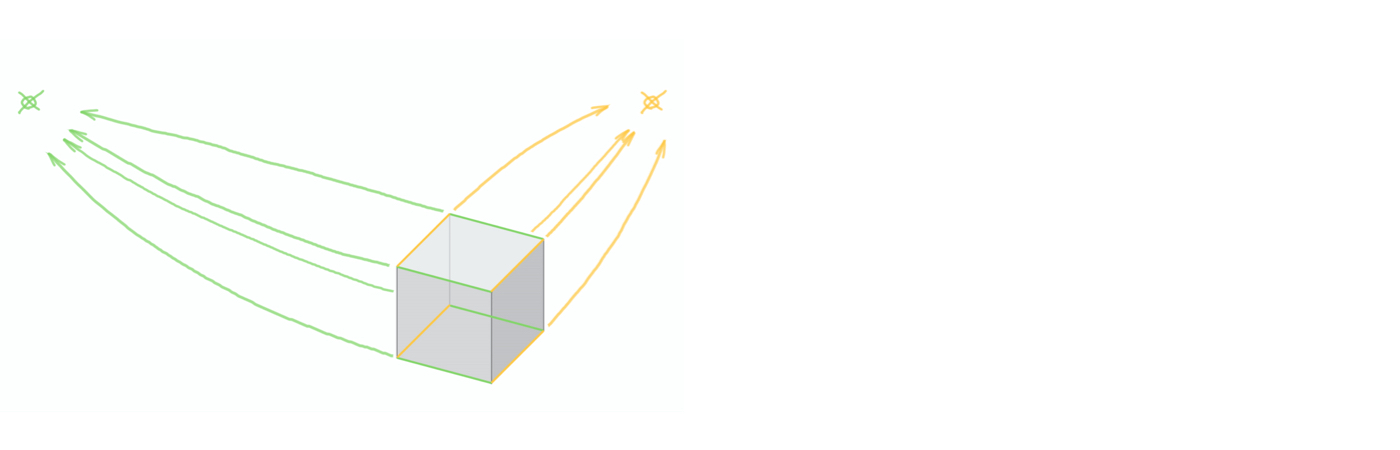
Several methods exist to represent a cube in a way that our eye perceives it in perspective. One of them is the two-point perspective. The trick is to have the widths and depths of objects converge to a single point each. We call these points "vanishing points". All the green edges (width) we connect to the left vanishing point, while all the yellow edges (depth) connect to the right one. I will explain exactly how this all works now.
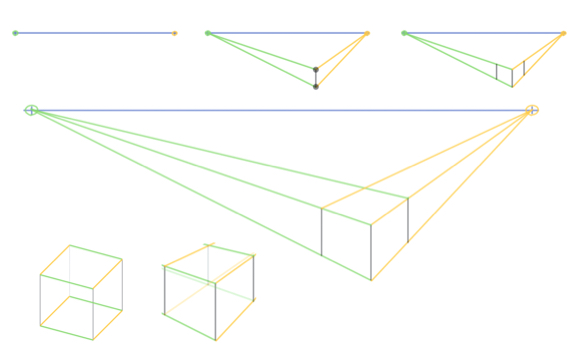
First we’ll need a horizontal line straight across the whole picture: the horizon (here it is in blue). Everything that appears above the horizon is viewed from below, and everything below the line we look at from above. On the horizon we mark our two vanishing points to the far right and left of the image.
Our cube should be placed below the horizon and a slightly right of center of the image. First of all, let’s draw the front vertical edge of the cube (the surface facing us). This will define the object’s position and height. The beginning and end points of the edge are therefore the two corners of the cube facing us. These corners we connect to the vanishing points.
We are now ready to draw the two outer vertical edges. Because their height depends on the two yellow and green lines, you’ll notice these edges are now a little shorter than the first edge. The further back we move the edges, the shorter they become. In other words: what we want in two-point perspective drawing.
The two new edges are parallel to the first edge. In a 2 point perspective drawing, all vertical lines are parallel. In this example, the cube is positioned slightly to the right. This means that the right side of the cube will be a little narrower than the left side. This happens because we are viewing it at a steeper angle. Therefore, we need to move the right edge a touch closer to the first edge.
Last but not least, draw in the back edges of the cube. In order to do this, we connect the two outer top corners of the cube to the opposing vanishing points. The missing back corner of the cube is created at the convergence of these two lines.
And at that, we have drawn a cube in 2-point perspective. Compared to our first cube, this one already looks so much more realistic.
With an eye to constructing more complex objects later on, you should also draw the hidden sides. You merely have to add the missing edges on the reverse side of the cube.
Now over to you: Figure out how to draw in 2-point perspective with more cubes, cuboids and boxes using the 2-point perspective technique. The resulting angles and directions are very unique and take on a pretty cool aesthetic.
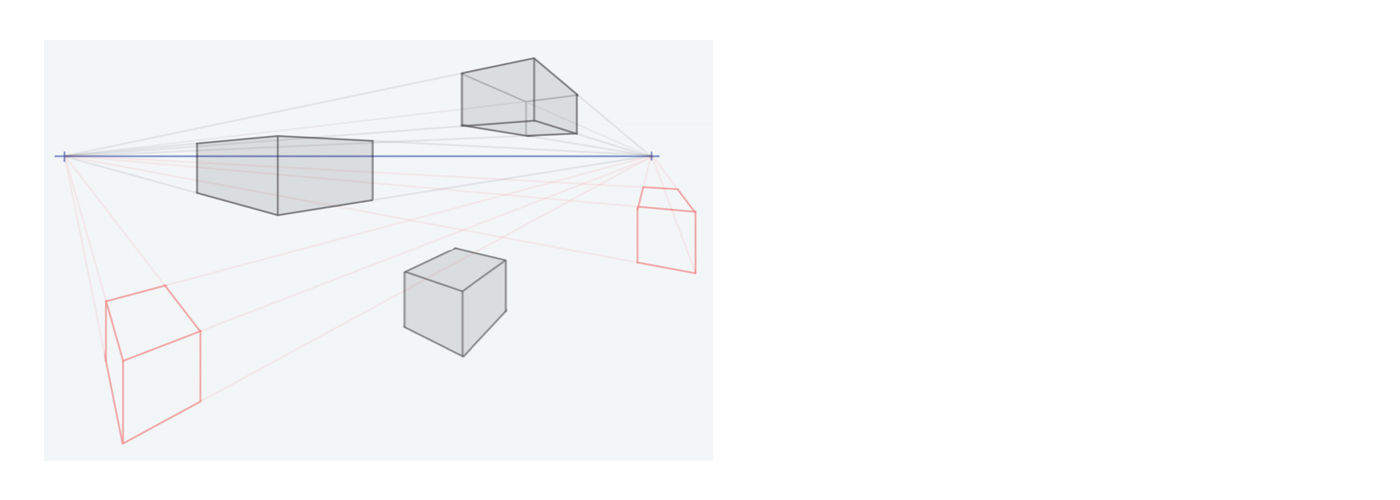
The 2-point perspective method does however also have certain limitations. For example, if you place an object on the far right of the image, or even outside the vanishing points, it will then distort so much as to no longer look realistic. Likewise, objects that are positioned too low or too high can create problems. So, make sure that you place your two vanishing points as far to the edges as possible from the start, and plan your image instead to be a bit smaller.
Of course, you can draw more than just boxes using the 2-point perspective. Once you have practiced a little, try your hand at other shapes.

Most shapes can in many ways be composed or arranged into boxes. These boxes can then be used in two-point perspective drawing. It is important to draw in the hidden edges as well.
Start off with a box and cut off an angled edge to draw a slanted roof like in the picture. You’ll again need to connect the newly created corners with their corresponding vanishing points.
In order to create a house roof like in the picture, you need to identify the centers of the house’s sides first. Be careful: because everything is foreshortened towards the vanishing point, the center axis also shifts backwards. You can either determine the center by feel, or if you want to be absolutely sure, draw the diagonals on the front and back of the house. That way you can be sure that you have found the center.
Round objects are always a bit trickier. But here too it helps to first draw a corresponding box that you can fit the round object into. The curves are now going to be much easier to draw in.
When drawing digitally, always make sure that you draw your construction lines on a separate layer. That way, you’ll be able to remove them more easily later on and won’t have to erase around the objects.
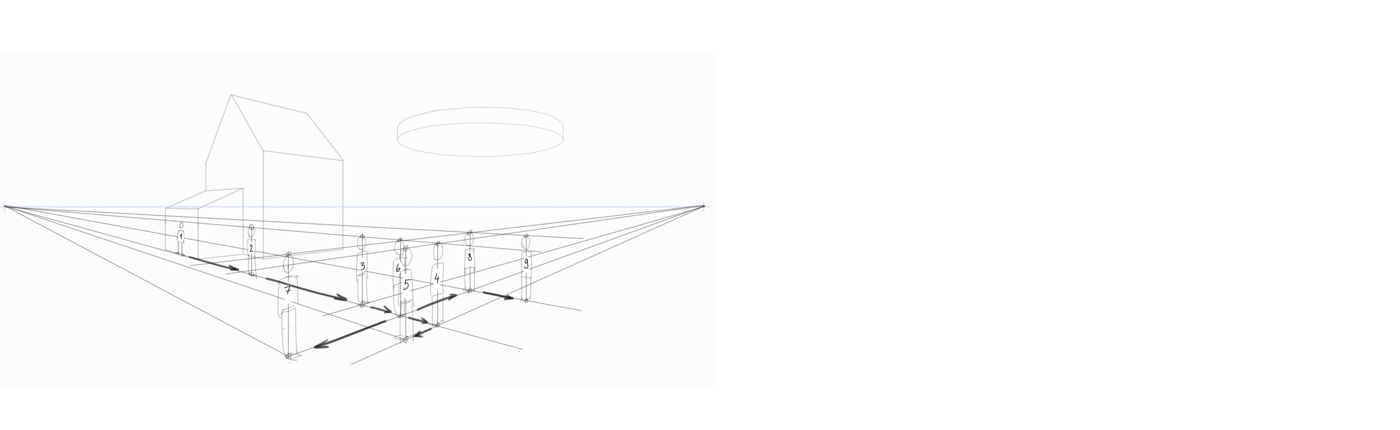
The two-point perspective can also assist you in determining proportions. The figures we are now placing on our landscape should be more or less the same size: The size should also match the house so that one person doesn't inadvertently end up looking twice the size of the house.
As you can see in the picture, I first drew the small "reference person" to the right of the house. Using him as a reference, I transfer his head height to the others one by one. You might lose the overview between the many lines and people before you know it. The best way to avoid any unnecessary confusion is to proceed in a logical order according to the picture. Also, make sure your construction lines are not too thick and that you draw only the necessary ones.
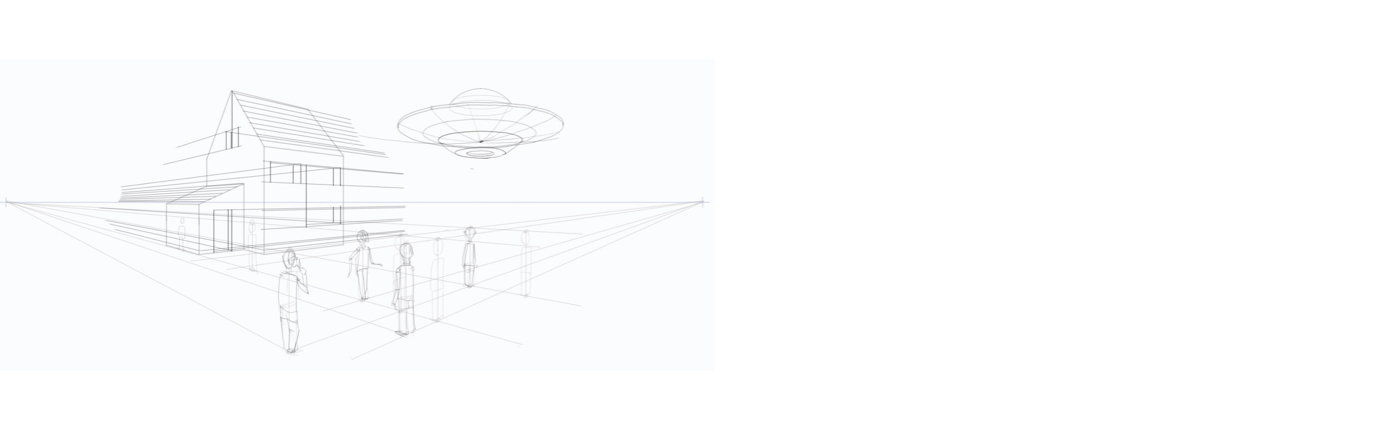
When all objects have been constructed, it’s time to get into the two-point perspective detail. But before you start with this, you should make room by removing all the guides that are no longer needed.
Now you can add in details like windows, roof tiles, doors and anything else you’d like. Naturally, every non-vertical line connects to its corresponding vanishing point.
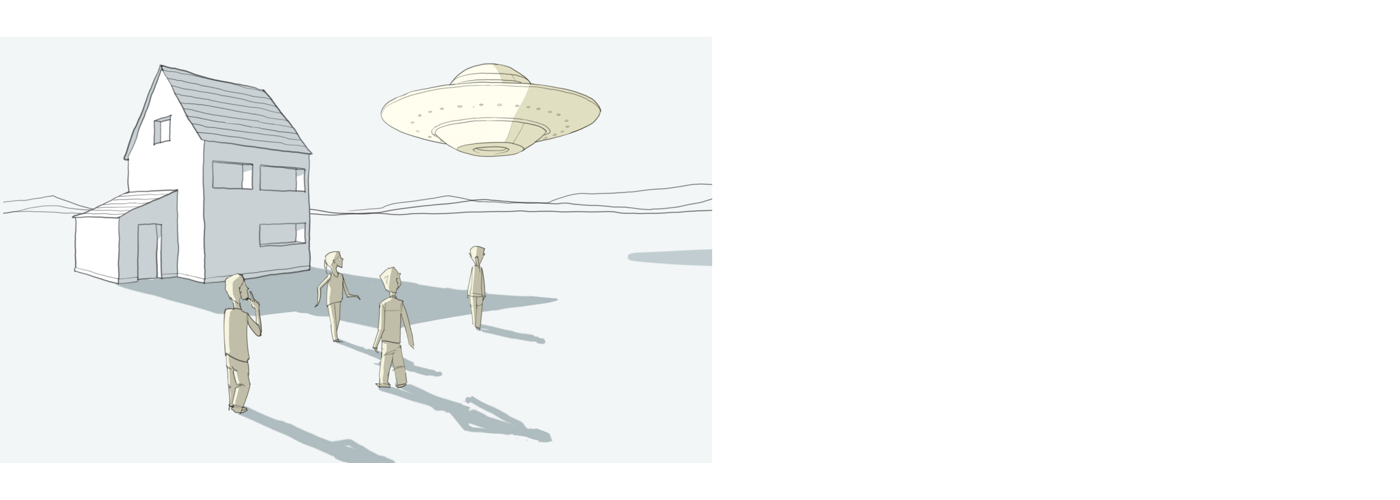
I hope you’ve had some fun and have gotten a nice overview of what you can do with 2-point perspective. While it is very useful, the two-point perspective is not always the best way to construct perspective. In later tutorials, we will cover some additional multi-point perspectives that can be used in other situations.
That being said, in many cases, 2-point perspective works very well: especially when objects are to be shown obliquely from the side, or when dealing with architecture, or depicting large areas. And, especially when the aliens come.
Have fun trying it out, and see you soon!
Wacom One creates a familiar pen-on-paper feeling, thanks to a 13.3” screen with natural surface friction and minimal reflection. The pen feels light and natural in your hand and transforms into a pencil, paintbrush or chalk in your selected software. All you need for drawing 2-point perspective. Creative software comes included, along with the ability to connect to your computer, as well as certain Android devices.

Wacom One 13 pen display
Draw, design and create directly on a high resolution screen with a precise pen.

Sketch, draw and edit images with a responsive pad, a precise pen and see your creations appear on screen.

Draw, design and create directly on a high resolution screen with a precise pen.
Wacom’s vision is to bring people and technology closer together through natural interface technologies. This has made it the world’s leading manufacturer of interactive pen tablets and displays as well as of digital styli and solutions for saving and processing digital signatures. The advanced technology of Wacom’s intuitive input devices has been used to create some of the most exciting digital art, films, special effects, fashion and designs around the world and provides business and home users with their leading interface technology to express their personality. Founded in 1983, Wacom is a global company based in Japan (Tokyo Stock Exchange 6727) with subsidiaries and affiliate offices around the world to support marketing and distribution in over 150 countries.